
You may have noticed the notification panel at the top of your phone. You can drag it down to see all the other options. The bottom sheet is similar to this. The only difference is that the bottom sheet is located at the bottom of the screen and users can drag it upwards to get the embedded options in it.
With React Native and its third-party plugin support, it becomes much easier to add different features. In this blog, we will learn to build the Bottom sheet in a basic React Native project, guided by the experts of react native development company.
What are the pre-requisite criteria?
● React Native environment setup– You can skip this step if you have used React Native framework earlier. It is a one-time step. However, if you are new, you must set up the environment. Make sure that you choose the correct React Native tool for your project. Here, I will be working on the React Native CLI and not the Expo Go.
So follow as I guide. Install Android Studio, the VS code editor, Java SE Development Kit, Node, and React Native CLI. These are the software that you have to install if you want to develop your project on Windows and Android.
For the detailed process, you have to check the linked article.
● A simple template for the project– Build a template to add the project later in the project. Create a folder. It can be in any of your local drives (C, D, E, or F).
open the cmd from this folder and run npx react-native init Bottom_Sheet –version 0.71.3.
This will create a React Native template ‘Bottom_Sheet’ in your local folder. You can give it a different name for your project.
Note that, we are using the 0.71.3 version of React Native. It is the latest version. The remaining part of the project will start from here. Now, let’s get the third-party library for the project.
● Installing react-native-raw-bottom-sheet– It is the most important step of this project. Here, you have to download the third-party library “react-native-raw-bottom-sheet”. This is one of the best features of React Native framework. This not only makes the task of developers much easier but also makes the codebase much more simple and easy to comprehend.
This library has zero dependencies, smooth animation, and zero configuration. It has drag down gesture which makes it easier for users to operate the bottom sheet and navigate to different sections of the app.
You have to run npm i react-native-raw-bottom-sheet on your project terminal to install and link it to your app.
Designing the codebase for the project

Image 1
The first thing that you have to do is import the required components and React Native hooks. This comprises the core components along with the third-party components. The core components are View, Button, StyleSheet, and Text. On the other hand, RBSheet is the component taken from the third-party library.
It also uses the useRef to update or access the value stored.
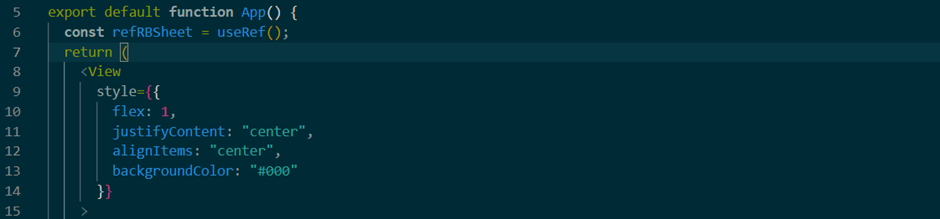
This code creates a React component called App. It uses the useRef hook to create a refRBSheet and visible state variable. The openRBS function is used to open the RBSheet when the button is pressed. The onClose function is used to set the visible state variable to false when the RBSheet is closed.
useRef() can be used to store a reference to a particular element or component and access it throughout the component’s lifecycle. This is useful when you need to access a particular element or component in order to manipulate it or get information from it.
It has a View element attached to it. Some styling is added. It includes 1 as its flex value, justifyContent, and alignItems at the center. The background color is given the code of #000. You can change the color of the background if you prefer.
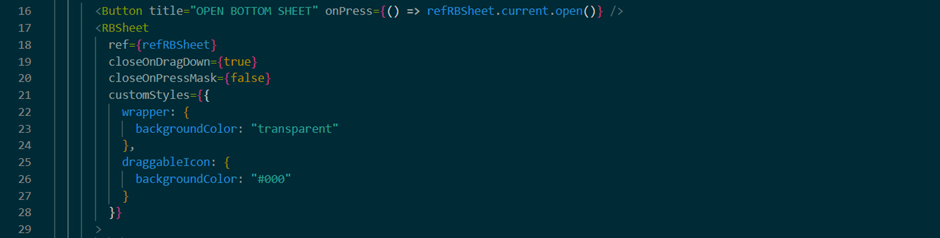
The code starts with a button that opens the bottom sheet. The code then creates an object called refRBSheet and assigns it to the current instance of RBSheet. It also sets closeOnDragDown to true, which means when you drag down this sheet, it will close automatically. Finally, it sets closeOnPressMask to false so that if you press anywhere else on this sheet other than where the button is located, nothing happens.
The background color of the wrapper is set to transparent and that of the draggable icon is given the color code #000. It gives a custom style to the bottom sheet.
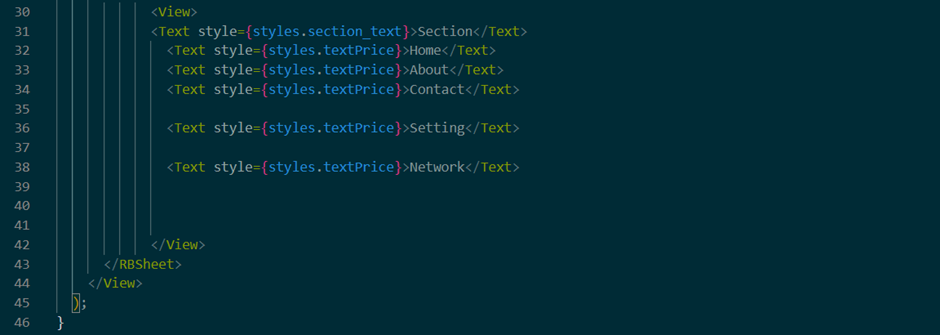
This code creates a view in a React Native application. The view contains five Text components, each with a different style. The styles are defined in a styles object, which is shown in the later part of the code. The Text components display the words “Section”, “Home”, “About”, “Contact”, “Setting”, and “Network”. These are the segments in the bottom sheet.
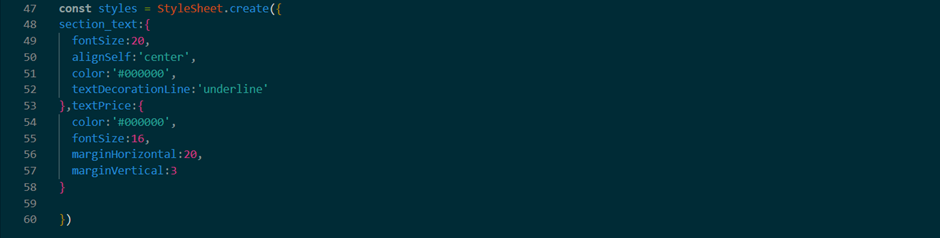
This code creates a StyleSheet object with two styles, section_text, and textPrice. The section_text style has a font size of 20, is aligned to the center, is black, and has an underline. The textPrice style has a font size of 16, a margin of 20 horizontally and 3 vertically, and is also black.
Executing the program
As you have completed the codebase, let’s now check whether we have correctly created the program or not. If it runs successfully, then we will be assured that we have successfully done it. For this, follow the below-mentioned steps.
➔ Go to your project folder or you can open your project from the VS code editor.
➔ Open a terminal and pass npm install.
➔ Then run npx react-native run-android. These are the two commands that you have to pass on to the created project terminal.
➔ Your emulator will start running.
Refer to image 6 for the output.
Hope you have enjoyed the process of building the bottom sheet. The main part is to install the third-party component and use the useRef hook. Create your bottom sheet in your react native app.